Is your beloved sofa looking a little… tired? Maybe the fabric is worn, the cushions have lost their plumpness, or it just doesn’t quite fit the vibe of your home anymore. Before you start browsing for a brand-new, expensive replacement, consider this: your sofa might just be begging for a revival. With a little know-how and some elbow grease, you can transform that dated or damaged piece into something truly special. It’s amazing what a bit of DIY can do to breathe new life into furniture you already own and love. Think of it as a spa day for your sofa, and you’re the expert therapist.
Let’s face it, buying a new sofa can be a massive expense. Not to mention the environmental impact of discarding perfectly good furniture. Often, the frame and structure of a sofa are still sound; it’s just the surface-level stuff that needs attention. Reviving your sofa is not only a budget-friendly move but also a sustainable one. It’s about giving a cherished item a new lease on life, saving you money and reducing waste. Plus, there’s a unique satisfaction in knowing you’ve given your furniture a makeover yourself. It’s a rewarding project that can totally change the feel of your living space.
Step 1: The Deep Clean – Erasing Years of Wear
The first and most crucial step is a thorough cleaning. Over time, sofas accumulate dust, dirt, spills, and odors. Start by vacuuming every nook and cranny. Seriously, get into those seams and under the cushions. For fabric sofas, check the manufacturer’s care tag for cleaning codes (W, S, W/S, X).
- W: Water-based cleaners are safe.
- S: Solvent-based cleaners (water-free) only.
- W/S: Either water-based or solvent-based cleaners can be used.
- X: Vacuum only – no liquid cleaners.
For minor stains, a mixture of mild dish soap and water can work wonders on ‘W’ or ‘W/S’ fabrics. Always test a small, inconspicuous area first. For ‘S’ code fabrics, you’ll need a specific upholstery solvent. Don’t forget to clean cushion covers separately if they’re removable. For leather, use a dedicated leather cleaner and conditioner to keep it supple and prevent cracking. This initial deep clean can make a surprising difference, often revealing the original beauty of the fabric beneath the grime.
Step 2: Cushion Comfort – Restoring the Plumpness
Sagging cushions can make even the most stylish sofa look sad and uninviting. If your cushions have lost their shape, there are a few ways to tackle this. Often, the issue is with the internal filling. You can purchase new cushion inserts (foam, polyester fiberfill, or feather down) and replace the old ones. Measure your existing cushion covers carefully to ensure you get the right size inserts.
Another trick is to ‘fluff’ your cushions regularly – this might sound simple, but consistent fluffing and rotating can help redistribute the filling and maintain their shape. If the foam is still good but just a bit compressed, you might be able to re-fluff it by taking it out of the cover and giving it a good punch and shake. For very worn-out foam, consider adding a layer of batting around it before putting it back into the cover. This adds a little extra padding and can help plump it up nicely.
Step 3: Addressing Wear and Tear – Minor Repairs
Don’t let small issues like loose threads, small tears, or worn patches get you down. Many minor damages are easily fixable with a DIY approach. For loose threads, carefully snip them with sharp scissors. If you have a small tear in the fabric, you can try to mend it using a needle and thread that closely matches the fabric color. For more significant rips, a fabric patch on the underside or a decorative upholstery patch can hide the damage effectively.
If certain areas of the fabric are particularly worn, you might consider using a fabric shaver to remove pilling and fuzz. This can make the fabric look much newer. For minor scuffs on leather, specialized leather repair kits can help blend and conceal them. It’s about being resourceful and tackling these little problems before they become big ones.
Step 4: Fabric Refresh – New Look, New Feel
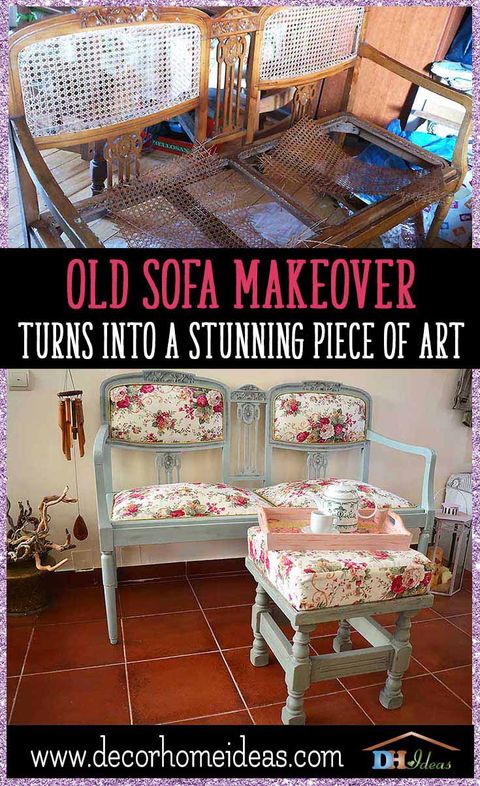
Ready for a visual transformation? Recovering your sofa is a significant undertaking, but it’s doable for the determined DIYer. If the original fabric is beyond repair or just not your style, reupholstering is the way to go. You can buy upholstery fabric by the yard from craft stores or fabric suppliers.
- Measure Twice, Cut Once: Carefully measure your sofa, noting the dimensions of each section you’ll need to cover. It’s often easiest to use the old fabric as a template.
- Upholstery Tools: You’ll need a good staple gun, upholstery staples, scissors, and possibly a tack hammer and upholstery tacks for a more traditional finish.
- Patience is Key: This is not a quick project. Take your time to ensure the fabric is pulled taut and smooth, especially around corners and curves. Start with less visible areas if you’re nervous.
If full reupholstering feels too daunting, consider simpler fabric updates like using a stylish sofa slipcover or adding decorative throw pillows and blankets. These can instantly change the aesthetic without requiring major surgery.
Step 5: Structural Touches – Tightening and Reinforcing
Sometimes, a sofa’s issue isn’t just cosmetic; it might feel a bit wobbly. Check for loose screws or bolts in the frame, especially where the legs attach. Tighten them up. If the frame itself has developed a squeak or a rattle, you might need to reinforce certain joints with wood glue and clamps, letting it dry thoroughly.
For sofas with wooden legs that are scuffed or dull, a quick sanding and a fresh coat of wood stain or paint can make a world of difference. Ensure the legs are securely attached after any work. A stable sofa is a comfortable and safe sofa, and these small structural adjustments can significantly improve its longevity and feel.
Step 6: The Finishing Touches – Style and Personality
Once the cleaning, repairs, and any reupholstering are done, it’s time to add your personal flair. This is where you really make the revived sofa your own.
- Pillows and Throws: Coordinate new throw pillows and a cozy blanket to complement the refreshed fabric. Mix textures and patterns for added visual interest.
- Accessorize: Consider adding decorative trim, piping, or even nailhead accents to the edges for a more tailored look.
- Placement: Think about how the sofa fits into your room. Sometimes, simply rearranging the furniture layout can make your refreshed sofa the star of the show.
These final touches are like the icing on the cake, transforming a clean and repaired piece into a stylish centerpiece for your living room. It’s about making it feel cohesive with your overall decor.
Reviving a sofa is a journey, not a destination. It requires patience, a bit of planning, and a willingness to get your hands dirty. But the rewards – a beautifully refreshed piece of furniture that you can continue to enjoy for years to come, all while saving money and being kind to the planet – are well worth the effort. From deep cleaning and cushion plumping to minor repairs and perhaps even a new fabric, you have the power to transform your tired sofa into a statement piece. So, go ahead, give your sofa the attention it deserves. You might be surprised at just how much life and beauty you can bring back into it.


